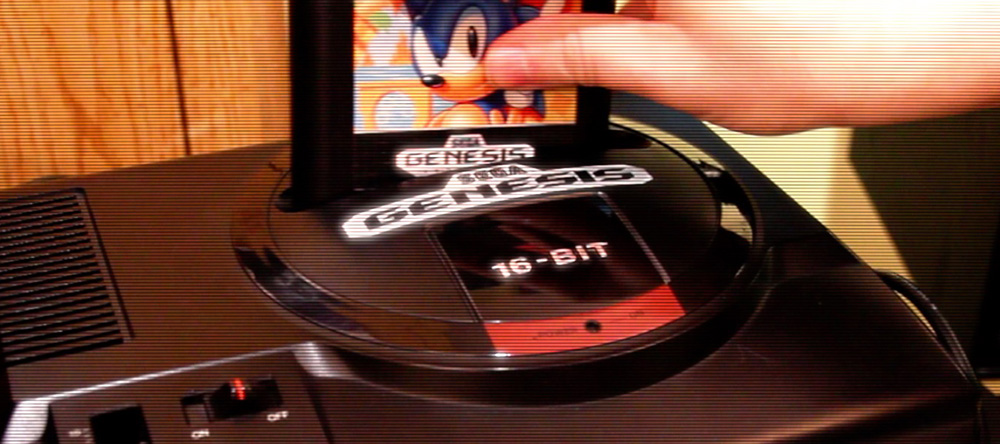
Welcome to the download and instructional page for Game Sack’s Glorious Scanline filter for use in Final Cut Pro 10.3 or newer. The main purpose of this filter is to simulate a 240p image being displayed on an interlaced CRT display such as old video game consoles, character generators, and other dumb things in your videos. The term “scanline” here is kind of a misnomer, as the real scanlines are the ones where you see the image. The black lines are actually the absence of scanlines caused by the electron beam skipping that row in favor of the next one. But whatever, for all intents and purposes we can think of scanlines as the black lines or the bright lines here. Nobody cares. I recommend using this filter when you zoom in for close-ups on retro games. Just putting them on your video the entire time even when not zoomed in is kinda tacky. Or you can put it on real video to give it a retro effect. It’s waaaay better and far more authentic than the fake scanlines used in tons of real high-budget movies. The filter is free, but you are encouraged to donate $50,000 on a monthly basis if you can. If you can’t, then instead donate $100,000 per month.
INSTALLATION:
1 - Download (this step is essential). Locate the file that you just downloaded. Might
be difficult if you
keep things cluttered. Don't feel bad.
2 - Unzip. This can be accomplished by double-clicking on the zipped file. This will
deliver unto you a folder called "Open Me". What has technology wrought?
3 - Now for the actual installation. You can easily do this in one of two ways. The first is to open the
Open Me folder and drag the Game Sack folder (the one marked red) onto/into the Drop here folder. Once it's
inside, that's it, you're done. The only way installation could be any easier is if it were a forced
auto-update from Microsoft.
If you'd rather do it manually, then follow this file path: Macintosh HD > Users > You > Movies > Motion
Templates > Effects > drop the Game Sack folder (the one marked red) in Effects. Easy-peasy. Of course you
can put it in any folder you want and Game Sack doesn't need to be it's own filter category, but that would
hurt my feelings.
4 - Now just launch Final Cut Pro and the filter will be under the Game Sack category. If you need even
more help finding it and have reviewed your previous installation steps, then perhaps there is no hope for
you.
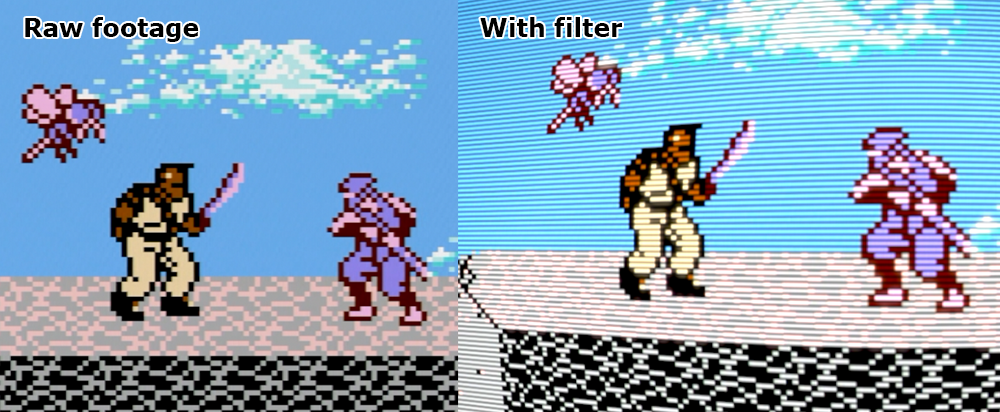
Here’s some of the differences the Game Sack Scanlines filter makes. On the left is the raw game footage capture, looking all blocky and stuff. On the right is with the super mega awesome Game Sack Scanlines filter applied. Look at how much more authentic it looks. Like a real CRT. You will also notice an improvement in the overall quality of your life.
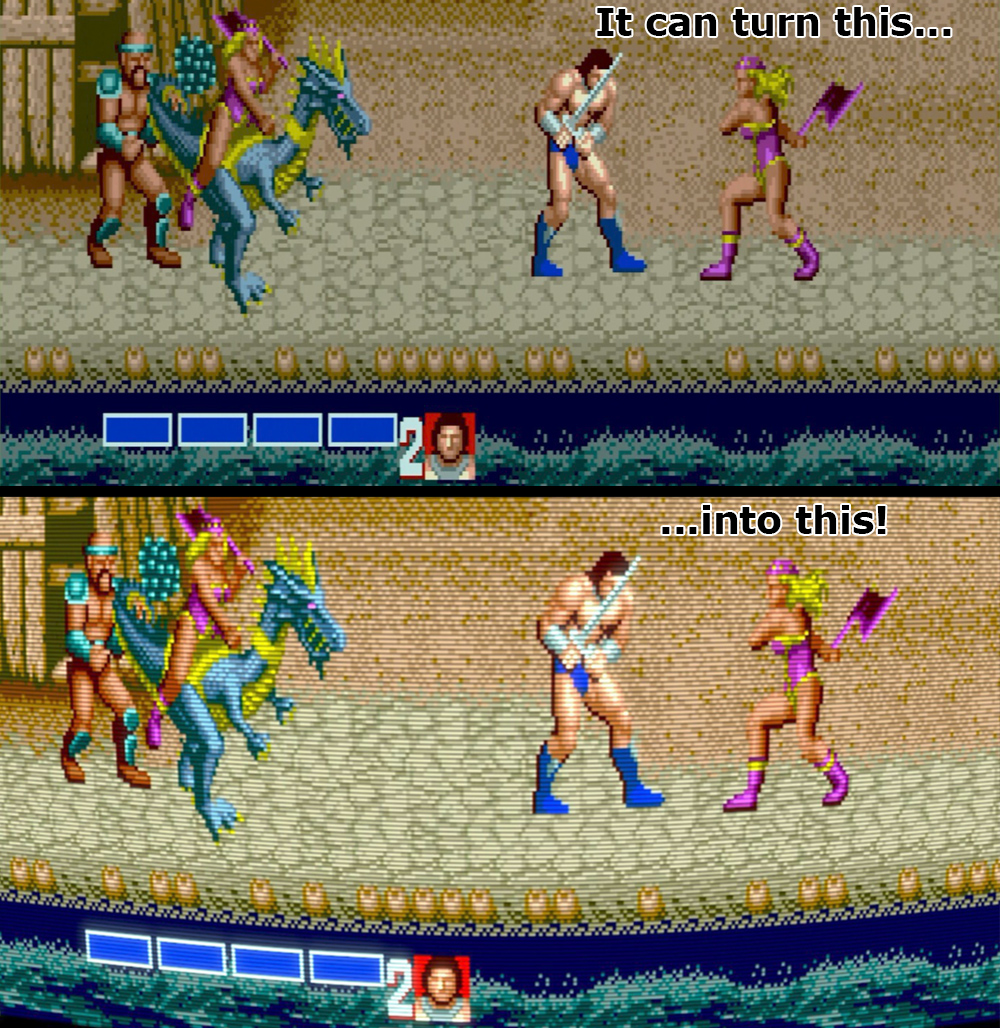
It can also be applied to real video if that's what your heart lusts for.
Feature Settings and Explanation
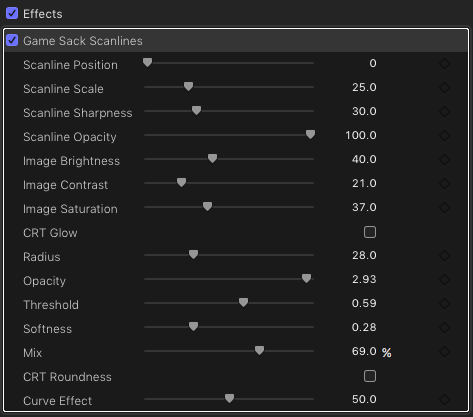
SCANLINE POSITION - Adjusting this slider moves the scanlines vertically. Not all video sources are the same and you may need to move the scanlines to get them to fall in the right place. Basically you want them on the edge of a row of pixels, either directly on top or directly below (same thing, really). You don’t want them going through the middle of a pixel. That looks bad and is just unprofessional. But you can put the lines anywhere you want with this filter!
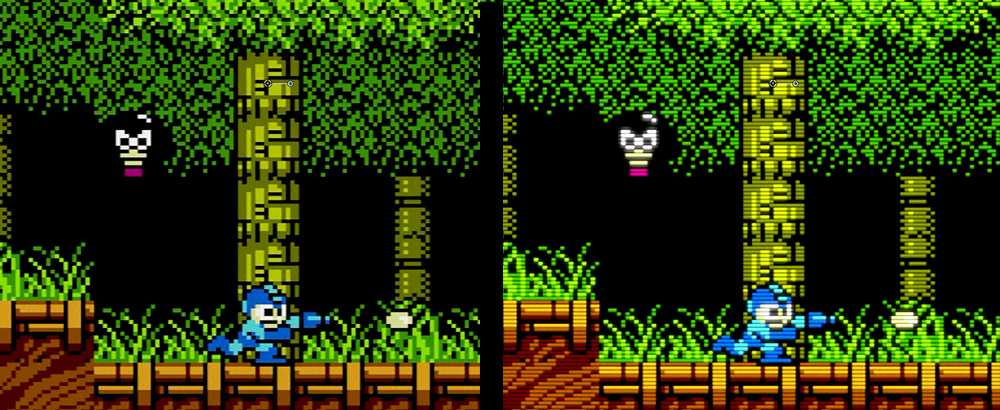
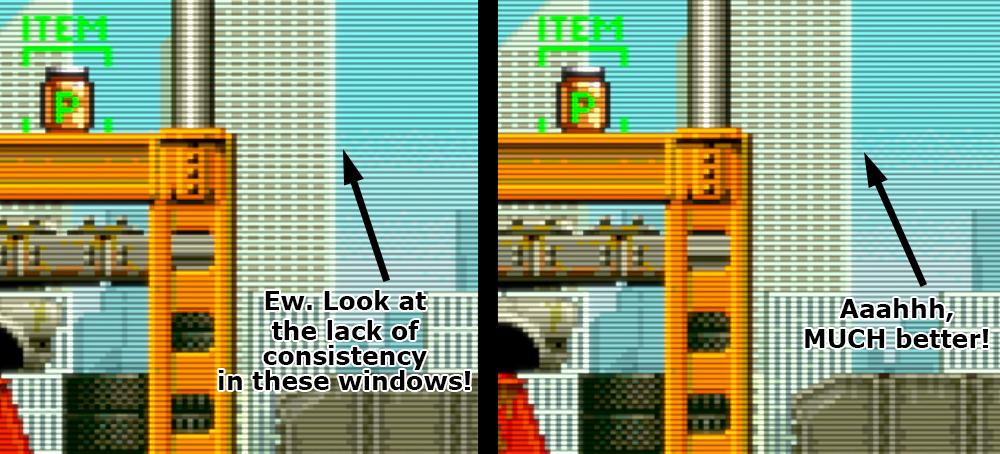
SCANLINE SCALE- Again, not all video sources are equal. The default value of 25 works for most stuff but it can be changed. Look at the windows on the building in the background of the image above. They're not consistent from floor to floor. If you leave it like this, people will question your attention to detail and perhaps even stop including you in their lives. In the right image I've adjusted the scale to a value of 22 which decreases the space between each of the black lines. The windows are now all uniform as they should be and the scanlines are perfectly landing on the edge of each row of pixels. You can use the slider, but I recommend typing in whole integers instead.
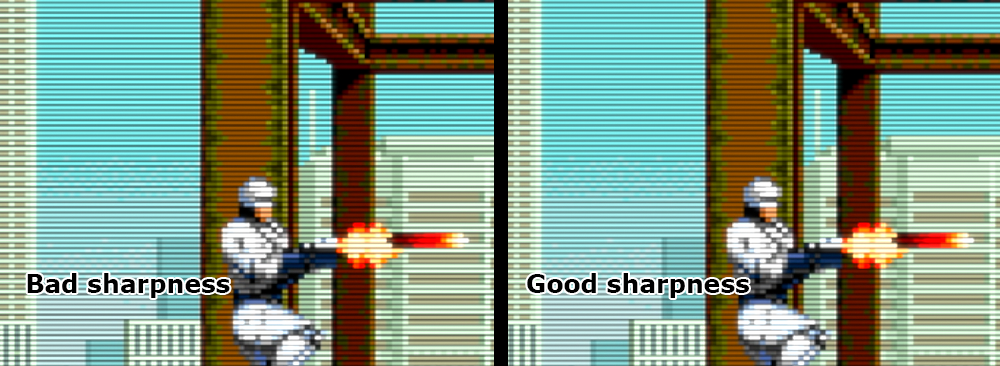
SCANLINE SHARPNESS - This does exactly what it says it does. Sometimes lines will appear more or less pronounced than lines above and below. Increase or decrease the sharpness slider to make sure all of the lines look uniform and consistent. This does not affect the sharpness of the video itself, only the scanlines.
SCANLINE OPACITY - Adjust to suit your taste.
IMAGE BRIGHTNESS - This adjusts the brightness of the video underneath the lines. Many fake scanline filters, especially those used in emulators, video scalers, and FPGA consoles just slap black lines over the image and call it a day. It looks awful and unprofessional. The image needs to be brighter than it usually is in order to look correct with fake scanlines applied. The image auto-brightens a bit when the filter is applied and it’s usually good enough, but can be changed depending on your taste and on the source video.
IMAGE CONTRAST - Here you can adjust the contrast of the video underneath if needed, though the default value is generally recommended.
IMAGE SATURATION - Sometimes the video underneath will need a little saturation bump especially when you’ve increased the brightness by any amount. Adjust that here.
CRT GLOW - This is a checkbox which defaults to OFF. On a real CRT, bright parts of an image will often have sort of a glow to them around their edges. Use the RADIUS slider to control how far out that glow travels from the edge, the OPACITY to adjust the, ummm, opacity I guess, the THRESHOLD to adjust the point at which the image starts to glow, and SOFTNESS to adjust… you guessed it, the softness of the glow. MIX is more or less the same as opacity I think. It’s only there to make the filter look more important and deep. Try not to go overboard with the CRT GLOW option.
CRT ROUNDNESS - This is another checkbox which defaults to OFF. Check it to enable it. Back in the day, CRT TVs were virtual globes instead of the flat screens we enjoy today. Hell, some TVs these days are actually concave. That’s dumb. Anyway back on track… this allows you to have a curvature to your video. Both the source video and the scanlines are affected simultaneously because this filter kicks ass. The default value is already pretty awesome. I mean if it weren’t, I wouldn’t have made it the default value. That’s right, Game Sack is always thinking of you, trying to make your life easy and enjoyable. You can adjust the roundness with the CURVE EFFECT slider. Adjust to the left to decrease the curve amount and to the right to increase it. Be careful because this can clip your video if you have shrunk it or moved it away from the edge of the screen. That’s just the way Final Cut Pro X is. Final Cut Pro X doesn’t love you as much as I love you. Like the CRT GLOW option, try to exercise some restraint here. And that’s it! Enjoy the filter! Tell ‘em Game Sack sent ya! Actually don’t tell them that if you do criminal activity. We hate subpoenas.